Introduction
If your sauna feels stuffy after 10 minutes—like the air got tired before you did—your problem probably isn’t the heater. It’s the breathing.
People love to blame the stove. Or the wood. Or the “weather.” Then they do the classic DIY panic move: drill a couple random holes and call it “ventilation.” Congrats, you’ve invented drafts.
Real sauna ventilation is boring in the best way. It’s controlled airflow that keeps oxygen coming, keeps heat from turning into weird hot/cold pockets, and keeps moisture from slowly wrecking your room from the inside out. And it needs to be planned alongside the heater, bench heights, and where humans actually sit—not slapped on at the end with a hole saw.
This guide is the no-fluff version: what ventilation is meant to do, where vents go, when you need a fan, and why barrel saunas play by slightly different rules.

What Proper Sauna Ventilation Is Meant to Achieve
Oxygen renewal without heat loss
You want fresh air without turning your hot room into a wind tunnel.
Most of the “I can’t breathe in here” complaints come from the same mistake: air enters and exits too fast in the wrong places (short-circuiting), or it barely moves at all (CO₂ builds up, people feel foggy). Heater makers aren’t guessing on this—Harvia’s guidance for electric-heater saunas calls for about six air changes per hour as a target.
The trick is warming incoming air on purpose. When supply air enters near the heat source (or above it, depending on the ventilation method), it joins the convection loop instead of dumping a cold stripe across ankles and shins.
Moisture and humidity management
Moisture is patient. It doesn’t need to “win today.” It’ll just sit in corners, soak into wood, and show up later as funk, staining, warped boards, and that lovely mystery smell nobody wants to talk about.
Good ventilation is also your drying system. Harvia even calls out an optional drying vent (kept closed during heating/bathing), plus the simple move that works shockingly well: leave the door open after use to purge humidity.
If you run steam-heavy sessions—lots of water on rocks, or a mixed-use setup that swings between dry heat and steamy rounds—this matters even more, because moisture load isn’t “ambient,” it’s event-driven. Big spikes. Big condensation risk.
Supporting even heat distribution
Here’s what most people miss: ventilation isn’t only about “freshness.” It shapes the heat.
Bad airflow creates two annoying zones at once:
- a cold dead area where air barely moves (usually lower corners or under benches), and
- a too-hot pocket that makes the room feel harsher than it should.
Harvia’s vent-placement recommendations are designed to keep the room’s convection pattern working for you, not against you—especially when you’re dealing with sensors, controls, and real-world bathing patterns (door opening, water thrown on stones, bodies blocking flow).
Core Principles of Sauna Ventilation Design
Intake and exhaust vent positioning
Vent placement is not a vibe. It’s geometry.
A few placements show up again and again because they work:
- If you’re using pressure-style / passive intake for an electric heater:Harvia points to supply air below or next to the heater, with a 50–100 mm supply vent diameter range.
- If you’re using mechanical ventilation (typical indoor builds):Harvia places the supply vent in the upper part of the sauna (often above the heater area), and warns you not to blast the temperature sensor with incoming air.
- Exhaust:Harvia’s guidance puts exhaust near the floor, far from the heater, and even suggests the exhaust duct diameter be about twice the supply diameter.
The point isn’t memorizing a diagram. The point is avoiding “short-circuit ventilation,” where fresh air goes straight from intake to exhaust without washing across the people on the benches.
And yes—people are the load. Vent the occupied zone, not the ceiling.
Natural airflow vs. assisted ventilation
Passive (gravity) ventilation can be totally fine—especially in simpler outdoor builds where you’re not trapped inside a tight house envelope.
But indoor saunas often need mechanical help, because the building itself fights you. You can’t rely on “air will find a way” when the sauna is inside conditioned space, with doors sealed, bathrooms on exhaust fans, and pressure differences doing weird things at random.
Harvia gets blunt about one common setup: if the exhaust is routed to a washroom, you need a door undercut/gap of at least 100 mm, and mechanical exhaust is mandatory in that case.
So if you’re planning an indoor sauna and hoping to “skip the fan” because it feels more traditional—cool story. Your house may disagree.
Correct vent sizing
Vents that are too small create the classic “stale sauna,” where people feel cooked but not comfortably cooked.
Vents that are too big create the other classic mistake: the room heats forever, the heater runs harder than it should, and you still don’t like the feel because there’s a draft line you can literally point to.
Two practical anchors you can use without getting lost in theory:
- Air-change target:Harvia’s “six times per hour” recommendation gives you a real design goal.
- Hardware sizing guidance:supply 50–100 mm, exhaust about 2× supply (duct diameter).
If you want a quick sanity-check calculation, do it like this:
CFM ≈ (Sauna volume in ft³ × ACH) ÷ 60
So a 6’×6’×7′ sauna is ~252 ft³. At 6 ACH, you’re around 25 CFM. Not hurricane-force. Just steady breathing.
Ventilation Requirements by Sauna Structure and Type
Traditional cabin saunas
Rectangles are predictable. That’s why cabin saunas are forgiving.
You can build a clean airflow path: heater area → across bathers → out on the far side. Bench tiers matter here because they decide where heads actually are, and heads are what complain first.
If you’re sketching layouts (or reviewing someone else’s), Smartmak’s own breakdown on planning—heater placement, bench tiers, and ventilation working together—is worth a look: Sauna Plans That Work: Layout Design, Comfort, and Smartmak Solutions.

And if you’re still fuzzy on what “dry sauna” really means (and why humidity swings change the ventilation feel), start here: What is a Dry Sauna.
Barrel sauna ventilation challenges
Barrels, especially the increasingly popular barrel sauna outdoor models, look simple. They aren’t.
Curved walls change circulation. Hot air doesn’t just stack; it rolls, slides, and “returns” along the curve. That can be great for heat feel, but it also means vent height has to match where people sit, not where a flat-wall rule-of-thumb says the vent “should” be.
One more barrel-specific issue: bench geometry. Many barrel layouts use opposing benches. If your intake dumps cold air into the leg zone between benches, people notice fast. If your exhaust is placed where the curve traps hotter air above it, you get uneven clearing and lingering moisture.
So the design job is: keep air movement intentional, and keep drafts off bodies.
Integrated ventilation in prefabricated barrel saunas (Smartmak integration)
This is where prefab gets unfairly underrated.
In a system like Smartmak’s 4–6 person outdoor barrel steam sauna (2.4 m size, model SH1824), the interior volume and heater spec are fixed up front—1800 × 2400 mm, electric stove, listed 6 kW, and features like transom windows are already part of the build concept. That’s the stuff ventilation planning hangs on.
Reference product page: Wholesale Custom 2.4m 4-6 Person Outdoor Barrel Steam Sauna Room.
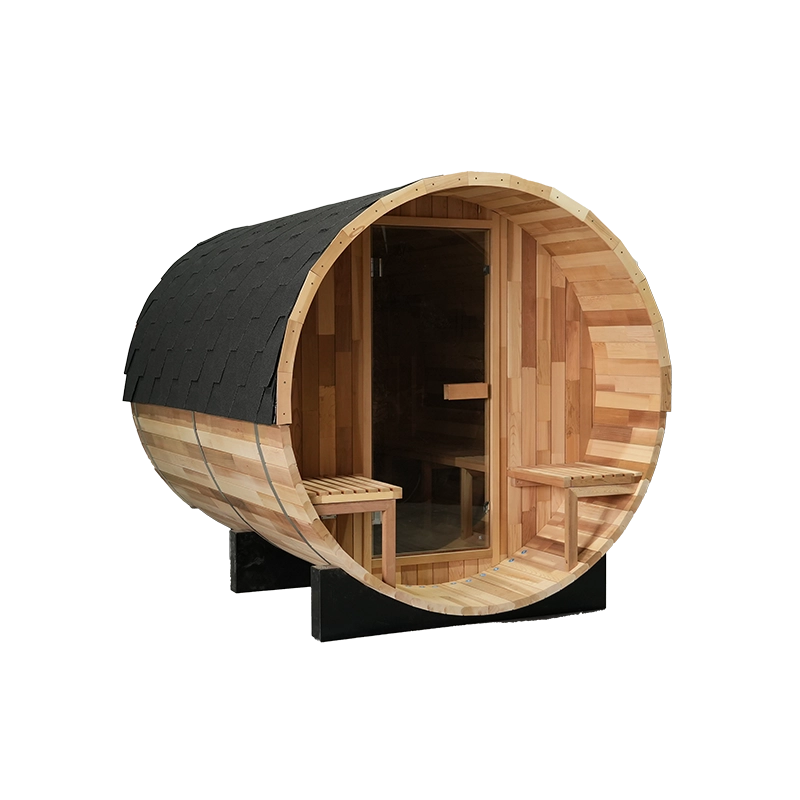
For B2B buyers, “engineered together” isn’t marketing poetry—it’s fewer surprises:
- Faster heat-up (because the room volume + heater output aren’t a random pairing).
- More predictable circulation (because the heater location and seating layout are already decided).
- Less moisture drama after sessions (because you can plan purge/drying behavior around real openings like transom windows, not wishful thinking).
- Fewer install and after-sales headaches (because you’re not asking every installer to “freestyle” vent placement on site).
If you’re speccing a more cabin-style outdoor unit (not a barrel), this one’s a good reference point for a larger-format traditional build: 6-Person Redwood Outdoors Traditional Dry Steam Sauna Room With Porch.

Common Sauna Ventilation Mistakes to Avoid
Placing vents too high or too low
Too high and you ventilate the ceiling while people marinate in stale air.
Too low (in the wrong spot) and you create a cold stripe that ruins the session. Harvia’s placement guidance changes depending on whether you’re using mechanical ventilation or pressure/gravity approaches—because the wrong “universal rule” is how people end up re-cutting holes later.
Ignoring seating and user zones
A sauna is not a museum exhibit. It’s full of hot, breathing humans.
If you don’t plan airflow across where heads and chests actually are, you get the classic complaint: “The thermometer says it’s hot, but it feels off.” Benches, backrests, and even how people recline all change the flow path.
Treating ventilation as a retrofit
Cutting vents after construction is like adding a steering wheel after you’ve already built the car.
You can do it, but you’ll compromise something:
- you hit framing you didn’t plan for,
- you end up venting into a cavity you shouldn’t, or
- you put the vent where it fits, not where it works.
Plan it with the heater and benches. Every time.
Overlooking commercial compliance
Private backyard sauna? You have flexibility.
Public/hospitality? Different story. Codes and inspectors care about ventilation openings, clearances, and documented design—Smartmak even calls out that the International Mechanical Code and regional rules can drive vent/clearance requirements, especially for public installs.
So don’t wait until the build is done to “see what the inspector wants.” That’s how schedules die.
Conclusion
Effective sauna ventilation is controlled airflow, not “more holes.”
Get the intake/exhaust relationship right, keep the airflow off ankles and across bathers, and plan for drying after the session—because moisture is what trashes saunas slowly, quietly, and expensively. Harvia’s guidance (air-change target, vent placement, sizing, door gaps) gives solid guardrails, and it’s worth respecting.
And if you’re investing in a custom sauna—whether for a private residence or commercial wellness space—the smart move is picking systems where ventilation is engineered from day one alongside heater placement, bench layout, and room volume. Repeatable performance beats installer improvisation every day of the week.
FAQ
What are the basic sauna ventilation requirements?
Aim for steady fresh air exchange without drafts; Harvia targets about six air changes per hour for electric-heater saunas.
How many vents does a sauna need?
At least two: one for supply air and one for exhaust. Harvia also mentions an optional drying vent (kept closed during use).
Does a sauna need mechanical ventilation or fans?
Often indoors, yes—especially when exhausting to adjacent rooms (Harvia notes mechanical exhaust can be mandatory in common indoor setups).
How does ventilation differ between steam and dry saunas?
Steam-heavy use loads the room with more moisture, so drying/purging matters more after bathing (door open, drying vent behavior, smart exhaust routing).
Are barrel saunas ventilated differently than cabin saunas?
Same goals, different behavior: curved walls change circulation patterns, so vent height and placement need to match real seating zones, not flat-wall assumptions.